Installation of 002 MT Custom Look for Public Facing Site on Office 365
- Importing a Design Package for Public Site on Office 365
- Changing the Look
- Adding Layouts (Pages) with Predefined Content to Public Site
This document applies to the following site type:
Public Facing Site on Office 365.
Installation Order
- Open your public site https://YourSharePointSite-public.sharepoint.com in your browser.
- Open the Solutions page by typing:
https://YourSharePointSite-public.sharepoint.com/_catalogs/solutions/Forms/AllItems.aspx
- Click Upload Solution (make sure the Solutions tab is selected in the Ribbon Area).
- Click Browse -> Navigate to the extracted YourPackage.zip file -> Design_Packages\OFFICE-365 folder -> Select the 002_PublicSite_PLT.wsp file -> Click Open -> Click Ok.
- Activate the uploaded solution.
- Open your public site https://YourSharePointSite-public.sharepoint.com in SharePoint Designer 2013
(to download SharePoint Designer 2013 visit the Official Microsoft® Download Center at http://www.microsoft.com/en-us/download/details.aspx?id=35491). - Navigate to Style Library -> Themable folder -> Right-click 001_MT-Images folder -> Check In -> Publish a major version.
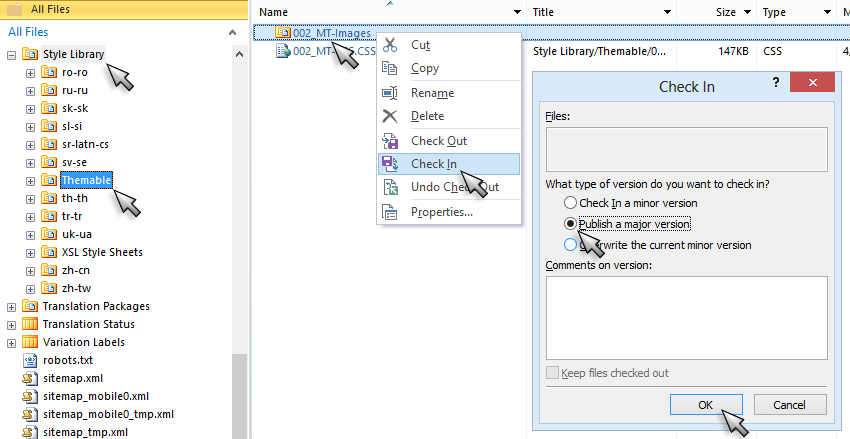
- Right-click 002_MT-CSS folder -> Check In -> Publish a major version.
(*If Check In is unavailable, Check Out the 002_MT-CSS -> Check In -> Publish a major version.)
- Click Change the look (on the Settings menu, or on the Site Setting page under Look and Feel).
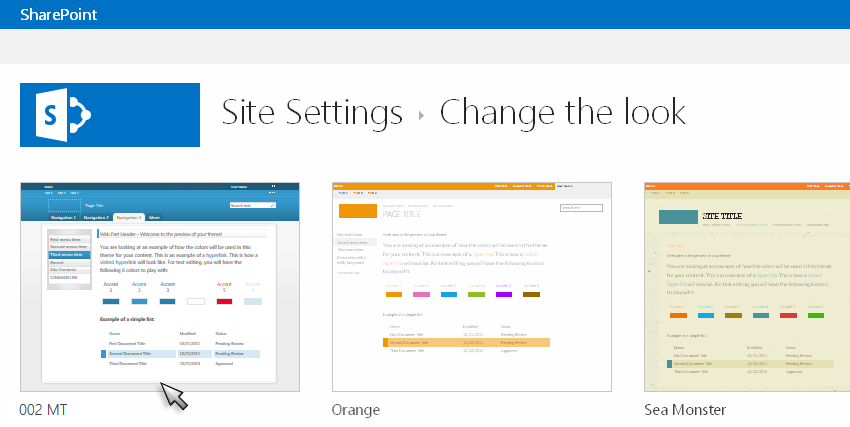
- Click the thumbnail 002 MT.
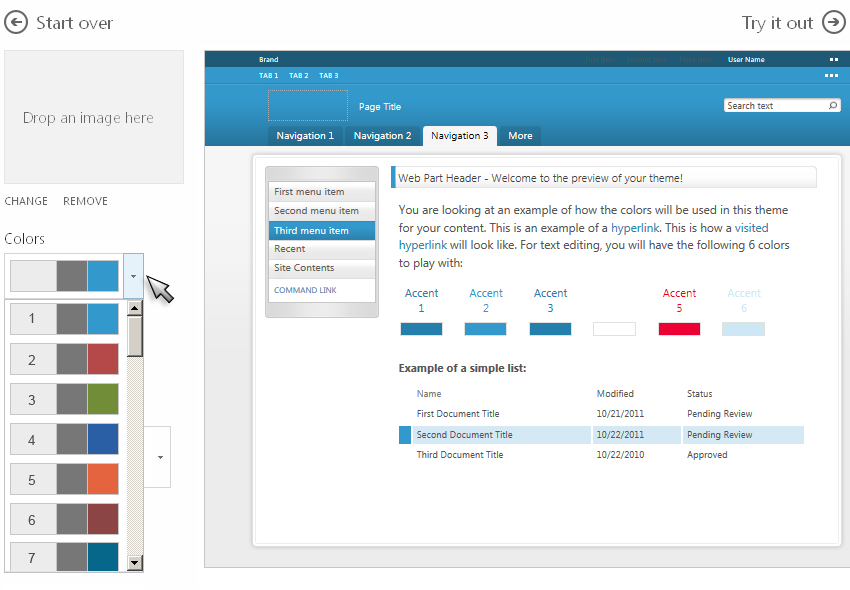
- From the Colors list, select one from the top 7 color palettes (listed as first 7 from the top). *IMPORTANT:
- For Site layout (Master Page) select 002_MT-Master_PBL.master, or 002_MT-Footer-PBL.master (*for Community Portal - leave unchanged).
- Fonts - leave unchanged.
- Click Try it Out -> Click Yes, keep it.
(*If some icons did not change color, reapply the 002 MT look.)
Only the top 7 color palettes from the list are designed for the 002 MT look (multiple color palettes are enclosed in the Platinum Package only). Out-of-the-box color palettes may not work properly with the 002 MT look.
If you cannot run SharePoint 2013 Management Shell, you will not be able to use Text Layouts (Wiki Pages with Predefined Content). You can only add Web Part Pages (with Predefined Content) to your sites.
The following Web Part Pages with Predefined Content are designed to be added to Public Site:
- Web Part Page SideBar - Left.aspx - 2-Column web part page layout with Left Sidebar
- Web Part Page SideBar - Right.aspx - 2-Column web part page layout with Right Sidebar
- Web Part Page Splash 3 - Column.aspx - 3-Column page layout, and No Side Navigation - designed for Welcome Pages
To add Web Part Pages with Predefined Content to your site in the case that you cannot run SharePoint 2013 Management Shell
- Open your public site https://YourSharePointSite-public.sharepoint.com in your browser.
- Navigate to Site Contents -> Pages (under Lists, Libraries, and other Apps).
- Click + new item -> Browse to Web_Part_Pages folder in your extracted YourPackage.zip -> Upload Web Part Page SideBar - Left.aspx.
You will notice the following error message:
Save Conflict
Your changes conflict with those made concurrently by another user. If you want your changes to be applied, click Back in your Web browser, refresh the page, and resubmit your changes.
- Close dialog box (click X) -> Press F5 (Refresh) -> The Web Part Page SideBar - Left.aspx will be added to the list.
- Upload the rest of files from Web_Part_Pages folder (Web Part Page SideBar - Right.aspx, and Web Part Page Splash 3 - Column.aspx).
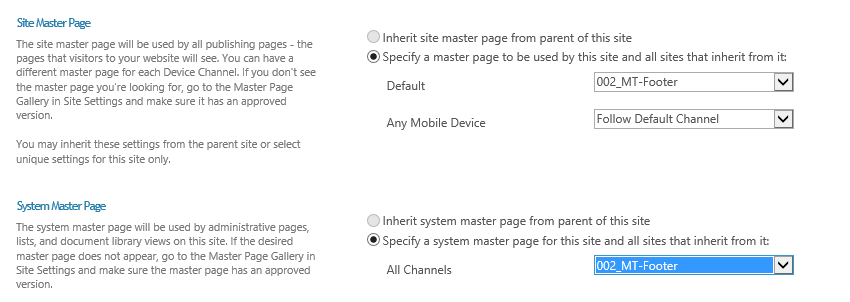
- Go to Site Settings -> Master Page -> Select 002-MT-Master, or 002-MT-Footer for both Site Master Page, and System Master Page
- Click any of the uploaded files -> Provide edits.
It isrecommended that you has a transparent background. For more information

This message will not be displayed for anonymous users, once you make your website available for public (MAKE WEBSITE ONLINE).